How to Use


INTERVAL
First notification (in seconds, minimum 5 seconds) – we found that some visitors exit a website within 10 seconds or less which is also known as bounce rate. We decided to have a setting to quickly display the message after 5 seconds (minimum) to try to keep the visitor on the website by displaying the notification box with what someone else has viewed, or purchased.
Interval (in seconds, minimum 20 seconds) – this is the period of time when the next notification box will be displayed. The content in the notification box will be displayed based on the log i.e will be displayed from the latest view or click to the oldest.

MESSAGE
Text Notification View – this is the message displayed when a visitors views a page, post or product
Text Notification Purchase – this is the message displayed when a visitor clicks on the Buy or Add to Cart button for a product

LOG
Show Notification from _ Days Ago – displays a log of all the pages and posts viewed and products purchased viewed. Try to keep this to a minimum to avoid having large logs.

LOCATION
Display Notification – you have the option to display the Notification Box on the bottom left hand side or the right. You choose.

DURATION
Duration Notification – this is how long the Notification Box is being displayed before it disappears. The minimum amount of time to display is 4 seconds + the time interval you set. To make it more noticeable we recommend you display this for longer.

TYPE
Currently, there are 5 types of views.
- Page view – displays pages that have been viewed
- Post view – displays blog posts that have been viewed
- Viewed Product – displays products visitors have viewed
- Purchased Product – displays which products visitors have clicked on the Buy or Add to Cart button. It also works with affiliate links.
- BuddyPress – displays the latest activity stream within BuddyPress

CUSTOM POST TYPE
Show Notification Custom Post Type – if your WordPress site uses custom post types you will now be able to display messages based on different custom post types rather one specifically for Posts.

SHOW NOTIFICATION RULES
Display Notification Box on the entire website – by default the Notification Box will be displayed across the entire website
Custom Selection – you can now have the option to select where you want to display the Notification Box. You have the option to select Home Page, Posts (select which particular posts), Pages (select which particular Pages), Product Pages (WooCommerce), Buddy Press pages and Custom Post Types (list will depend on which plugins are installed)

SIZE
Notification Size – this is the size of the Notification Box. The default is 250×100 pixels. This is a good size for displaying on mobile websites.

COLOUR
Notification Colour – you can set the colour of the side vertical bar on the Notification Box. If you leave the default, it will display a colour to match the WordPress theme you are currently using.
Notification Background Colour – you can set the colour of the Notification Box. If you leave the default, it will display a colour to match the WordPress theme you are currently using.

POWERED BY
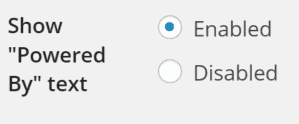
Show “Powered by” text – The default setting is disabled. However, we want as many people to use our Notification Box plugin and need your help. If you can support us by displaying our Powered by message with our link we really appreciate the exposure. All you have to do is select Enabled. If you can’t, then we understand.

Show Time, Views, Clicks
Show Time (In Notification Popups) – the default setting is Hide. This hides time “x hours ago”, when someone last list visited that page/post. To display the time select Enabled.
Show View Count (In Notification Popups) – the show view count displays the number of times the product/post/custom post was displayed
Show Click Count (In Notification Popups) – the show click count displays the number of times the product/post/custom post link was clicked from the Notification Box

CUSTOM NOTIFICATION
The custom notification feature is the most powerful feature we built in the WordPress plugin. We decided to include this feature to give you the website owner the flexibility to add your own custom message or marketing material. You can even display videos, signup forms and the possibilities are endless. You can pretty much use shortcodes to display anything you want.
Status Custom Notification – you have the option to disable or enable the custom notification. If you don’t want to use this feature simply click on disabled.
Time interval – the time interval is the period of time when the next notification notification box will be displayed. The minimum setting is 20 seconds.
Duration Notification – this is how long the Custom Notification Box is being displayed before it disappears. The minimum amount of time to display is 4 seconds + the time interval you set. To make it more noticeable we recommend you display this for longer.
Custom Notification Text – here you can add text, images, videos or shortcodes. It’s basically like creating a new post but it will be displayed in the Custom Notification box. As per the example, you can use shortcode to display anything you want.

EXTENSIONS
Buy Extensions – we intend to add additional functionalities and we will do this by using Extensions. These are additional plugins that work and enhance the Notification Box and are an additional cost.
Once installed, the extensions will be displayed underneath the Settings Menu.

EXPORT AND IMPORT SETTINGS
Export Settings – quickly and easily export all settings which can be used as a backup or restore for future use
Import Settings – quickly and easily import all backed up settings

LOGS
Sorting – you now have the option to sort each column in the logs and we have included the number of clicks

CLEAR SETTINGS AND LOGS
Clear Notification Logs – quickly and easily clear all the notification logs
Clear Settings – quickly and easily clear all settings


